INSTRUCTIONS
TAR CAT ASSEMBLY TUTORIAL
(Video also included in files)
Optional Hot Glue Sueding Tutorial
FIRE UP YOUR CHIRAL PRINTER
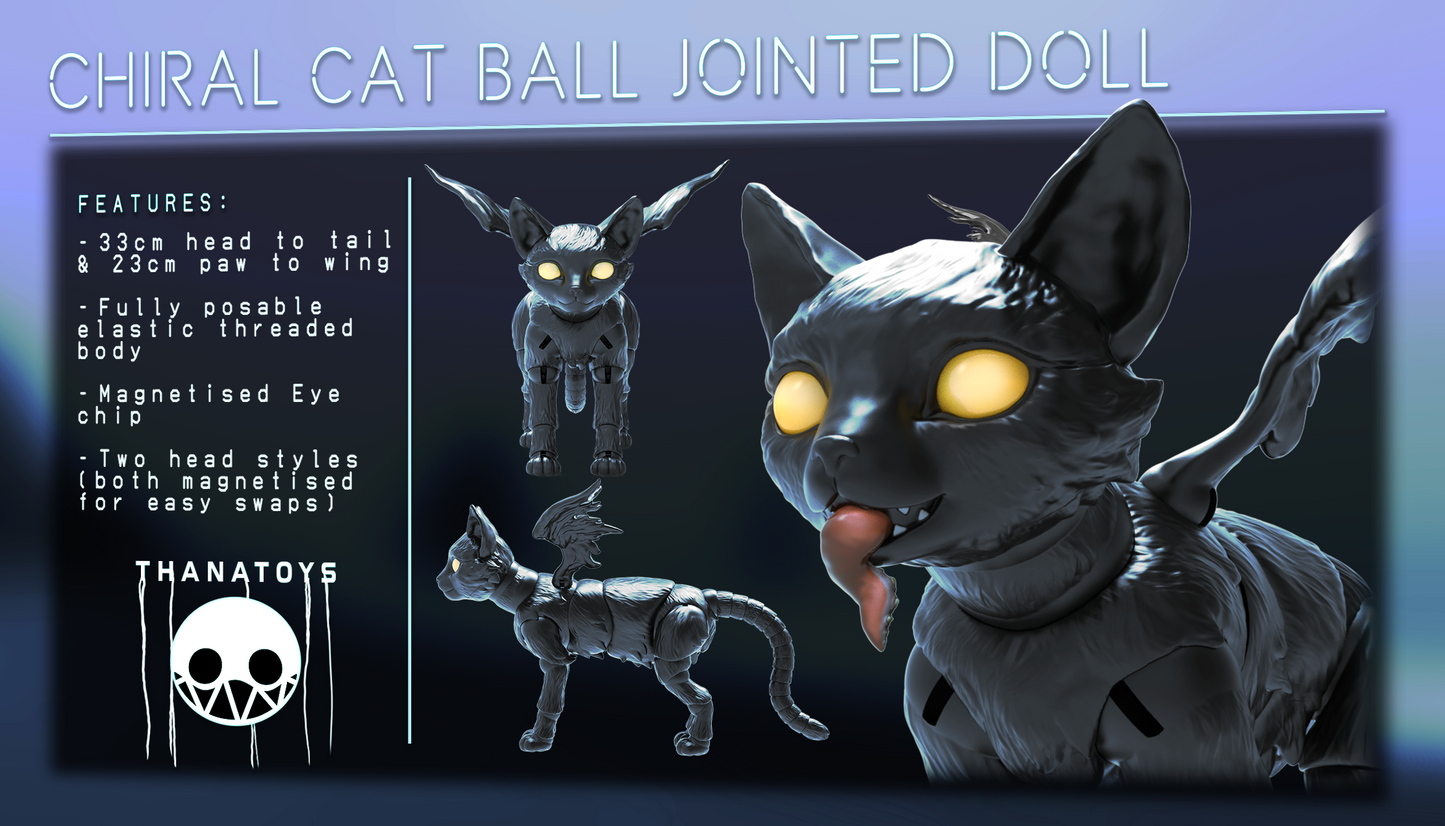
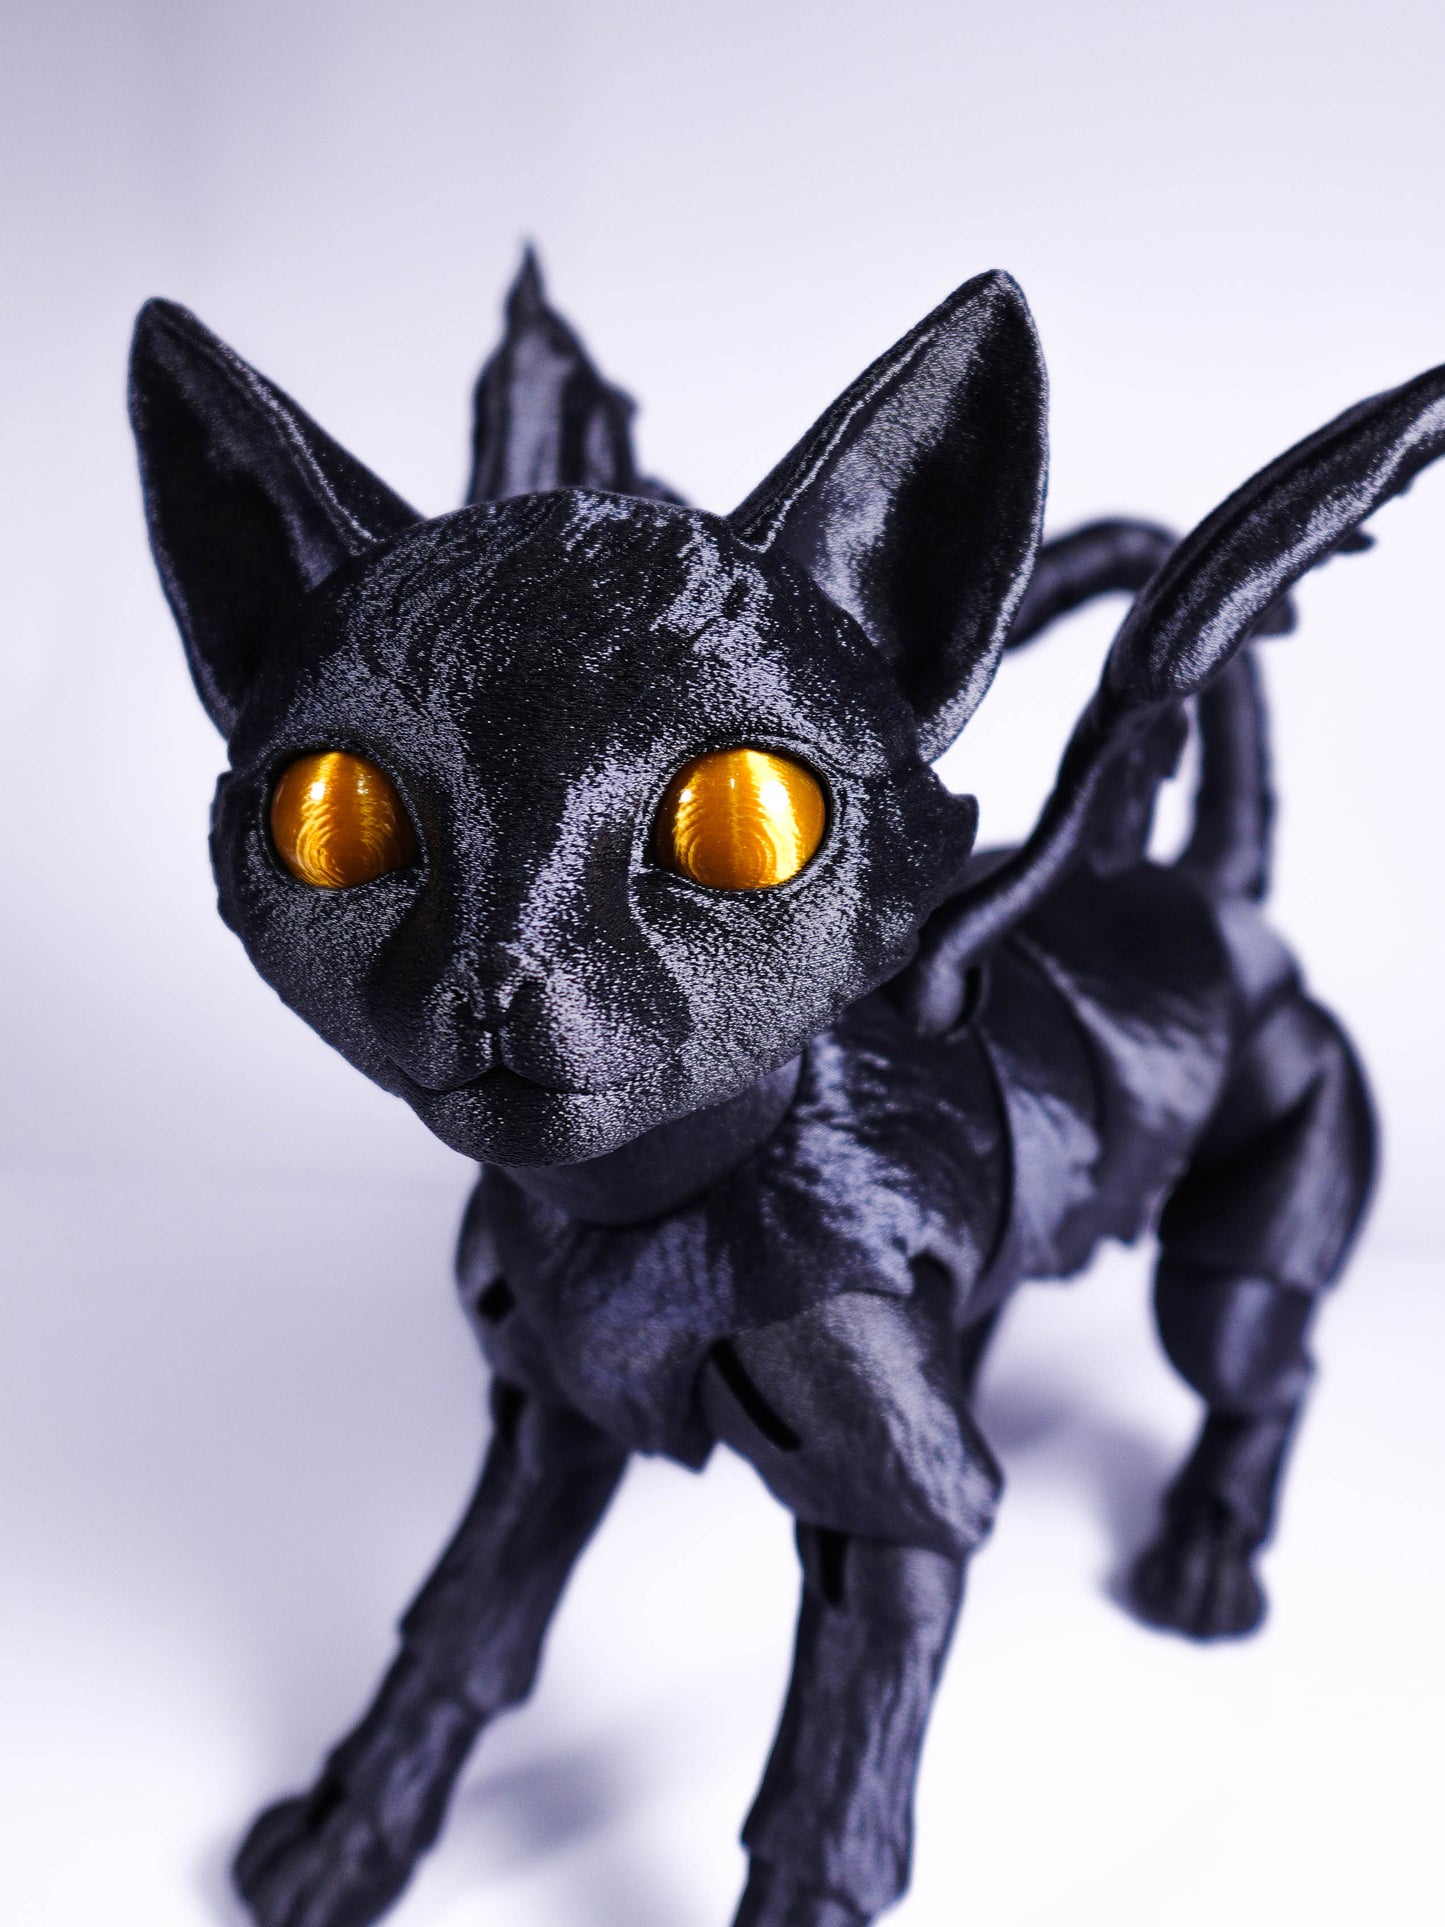
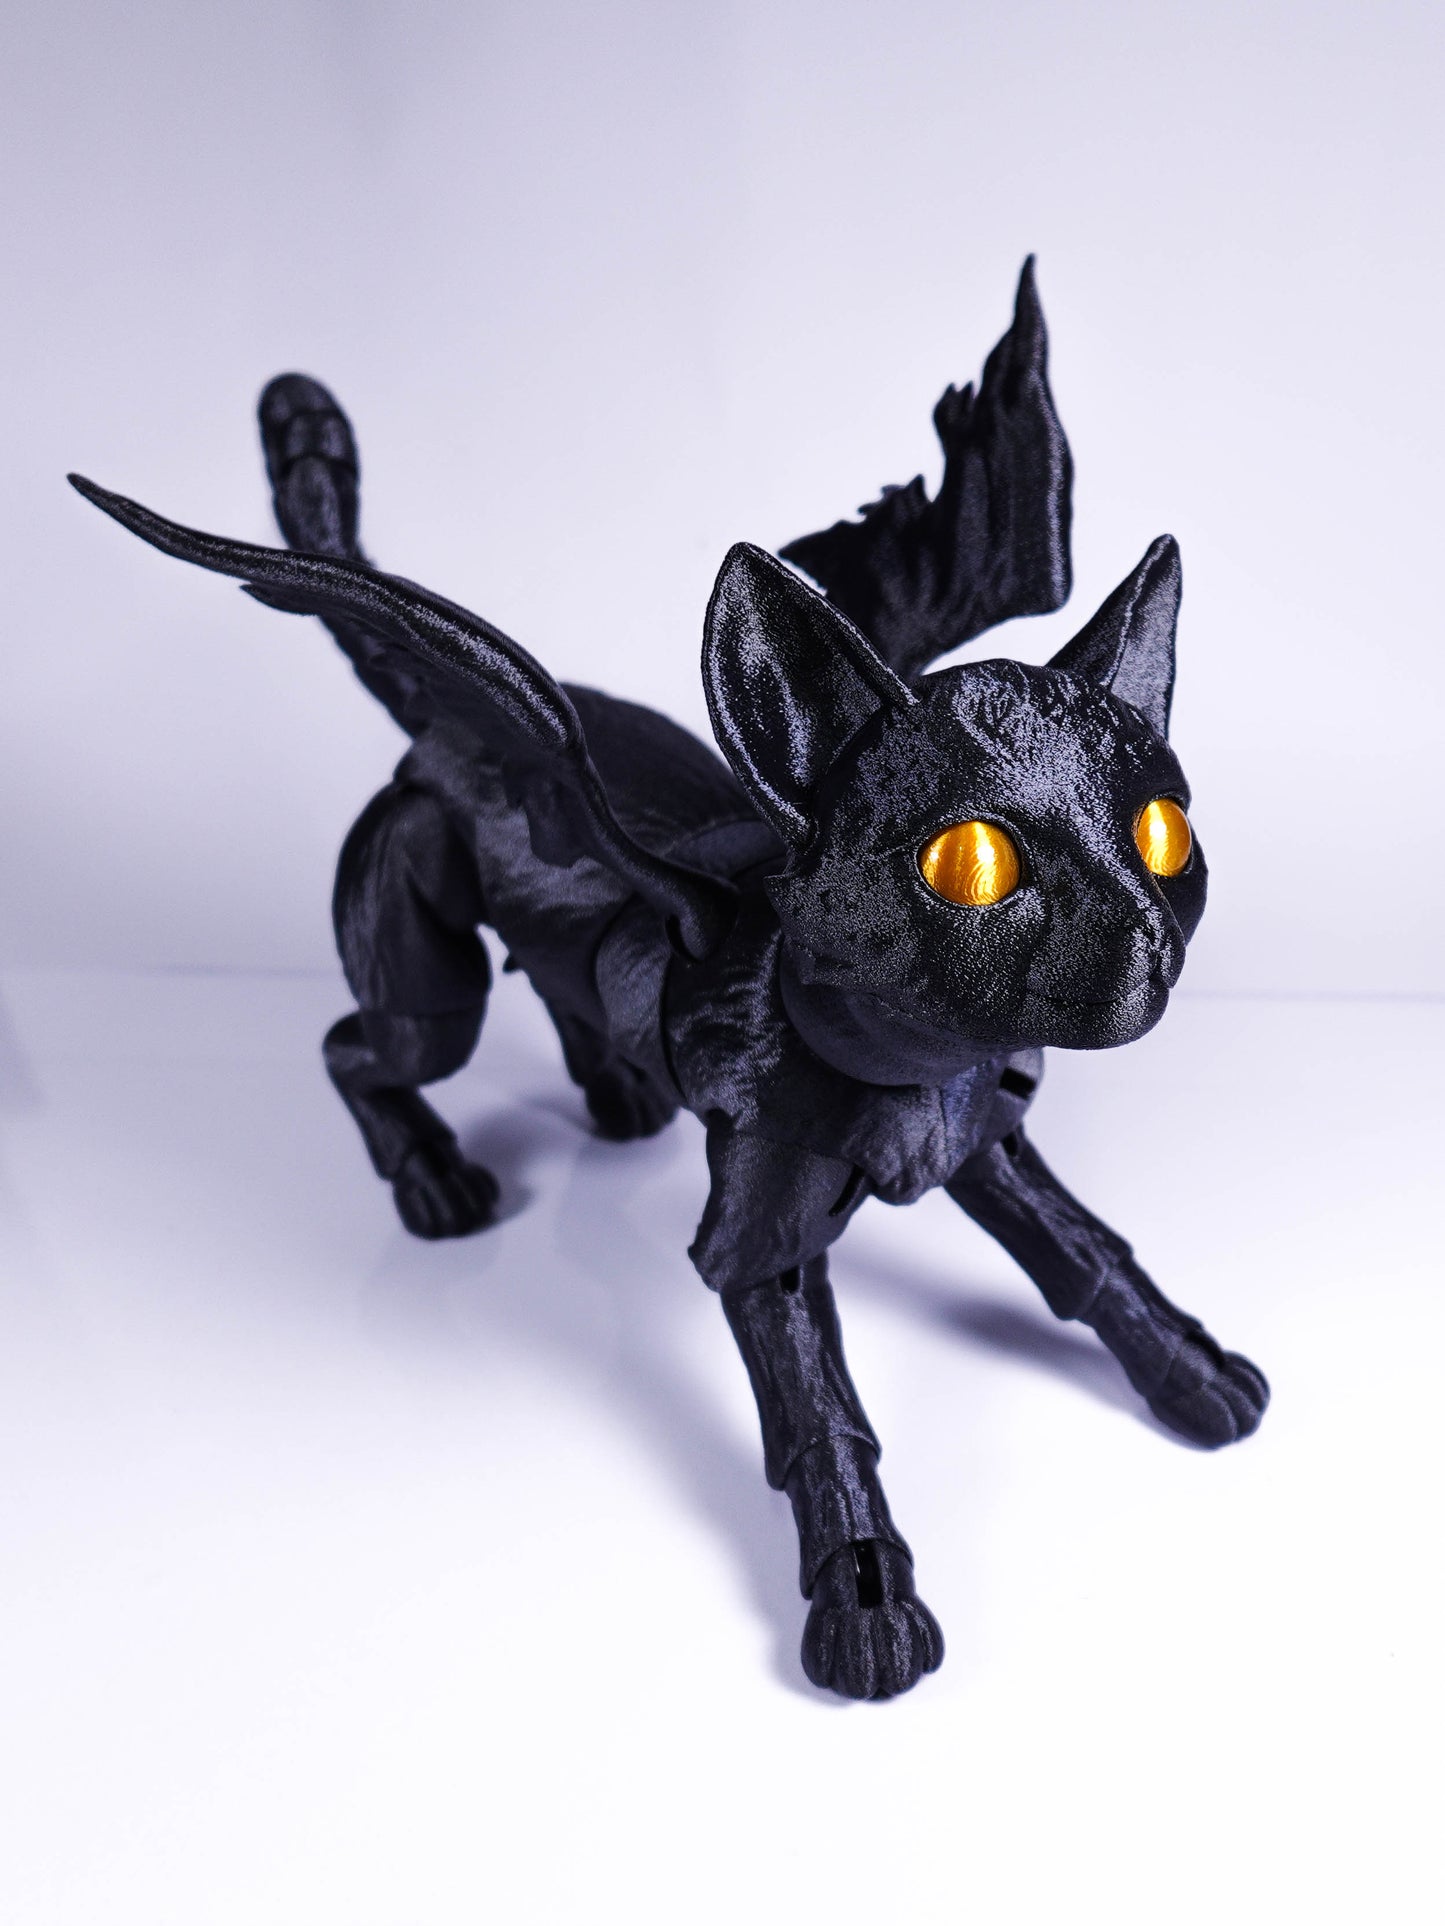
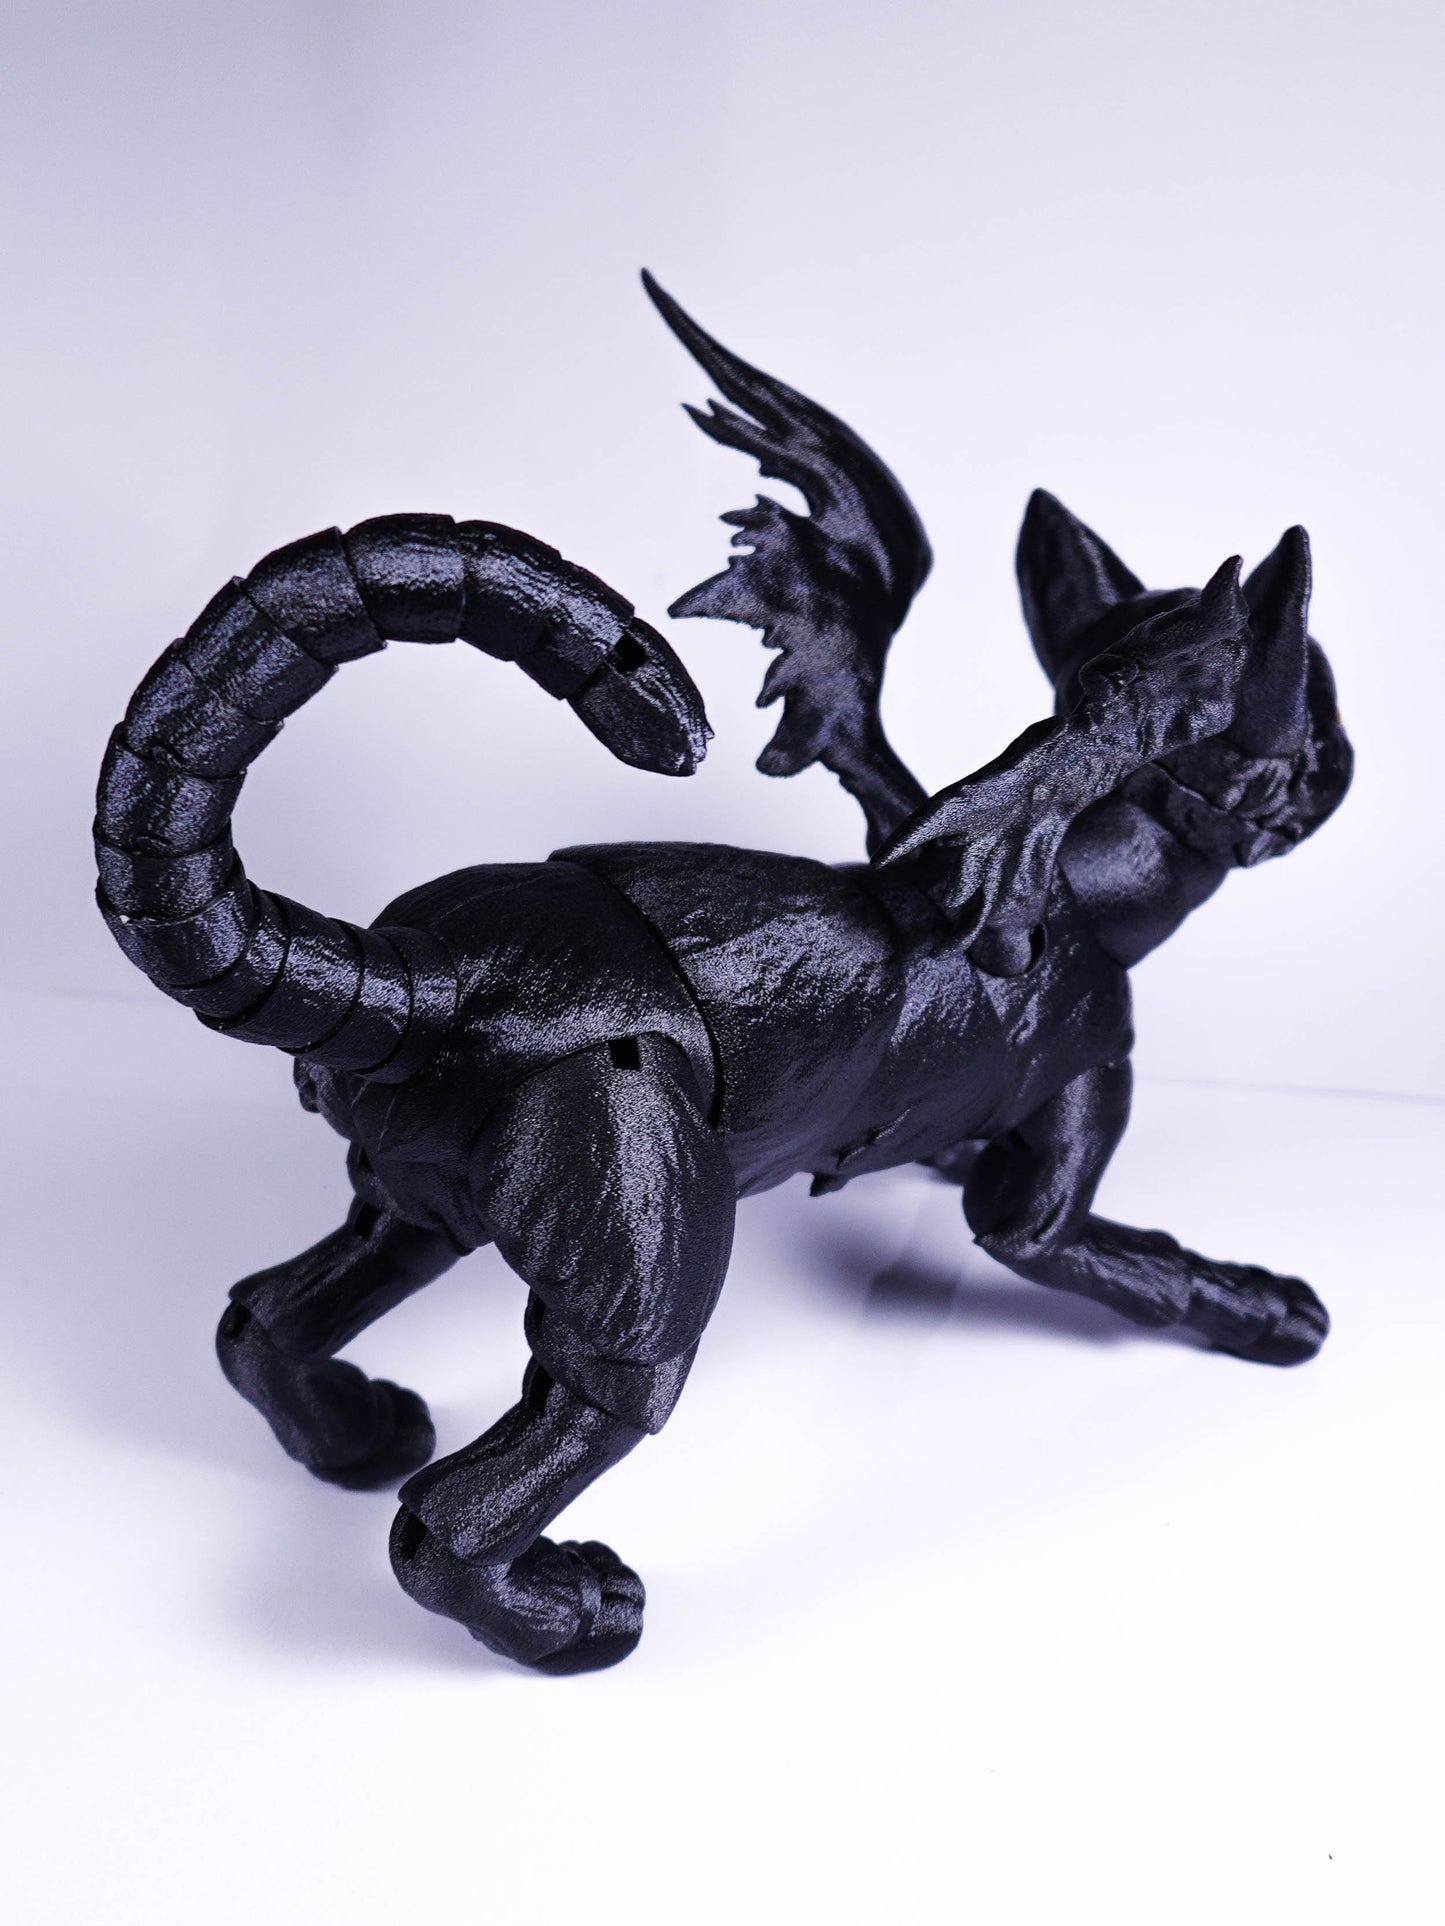
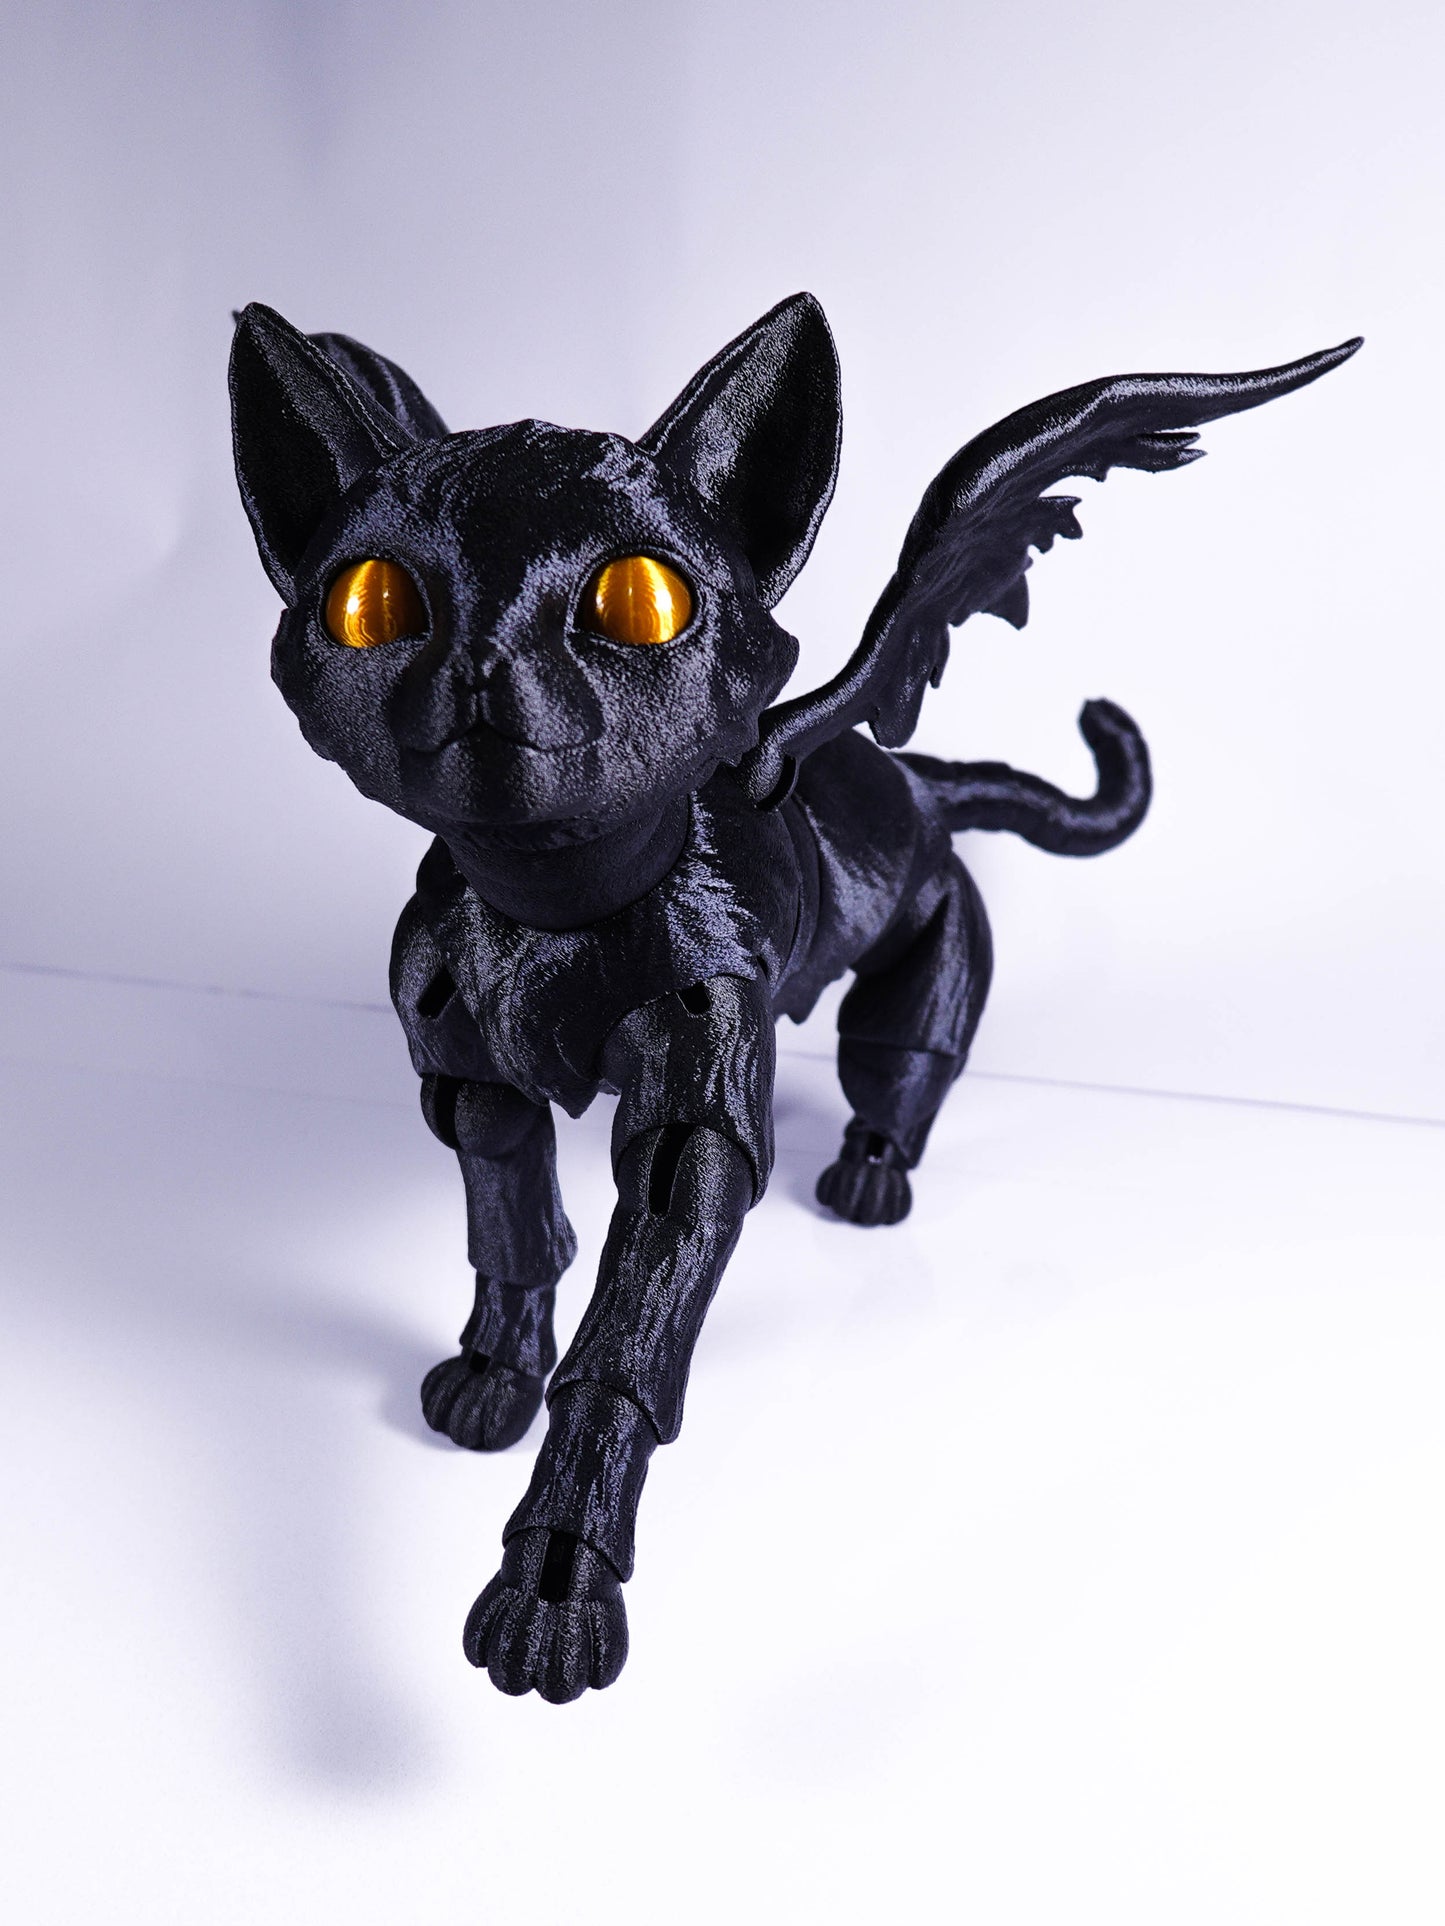
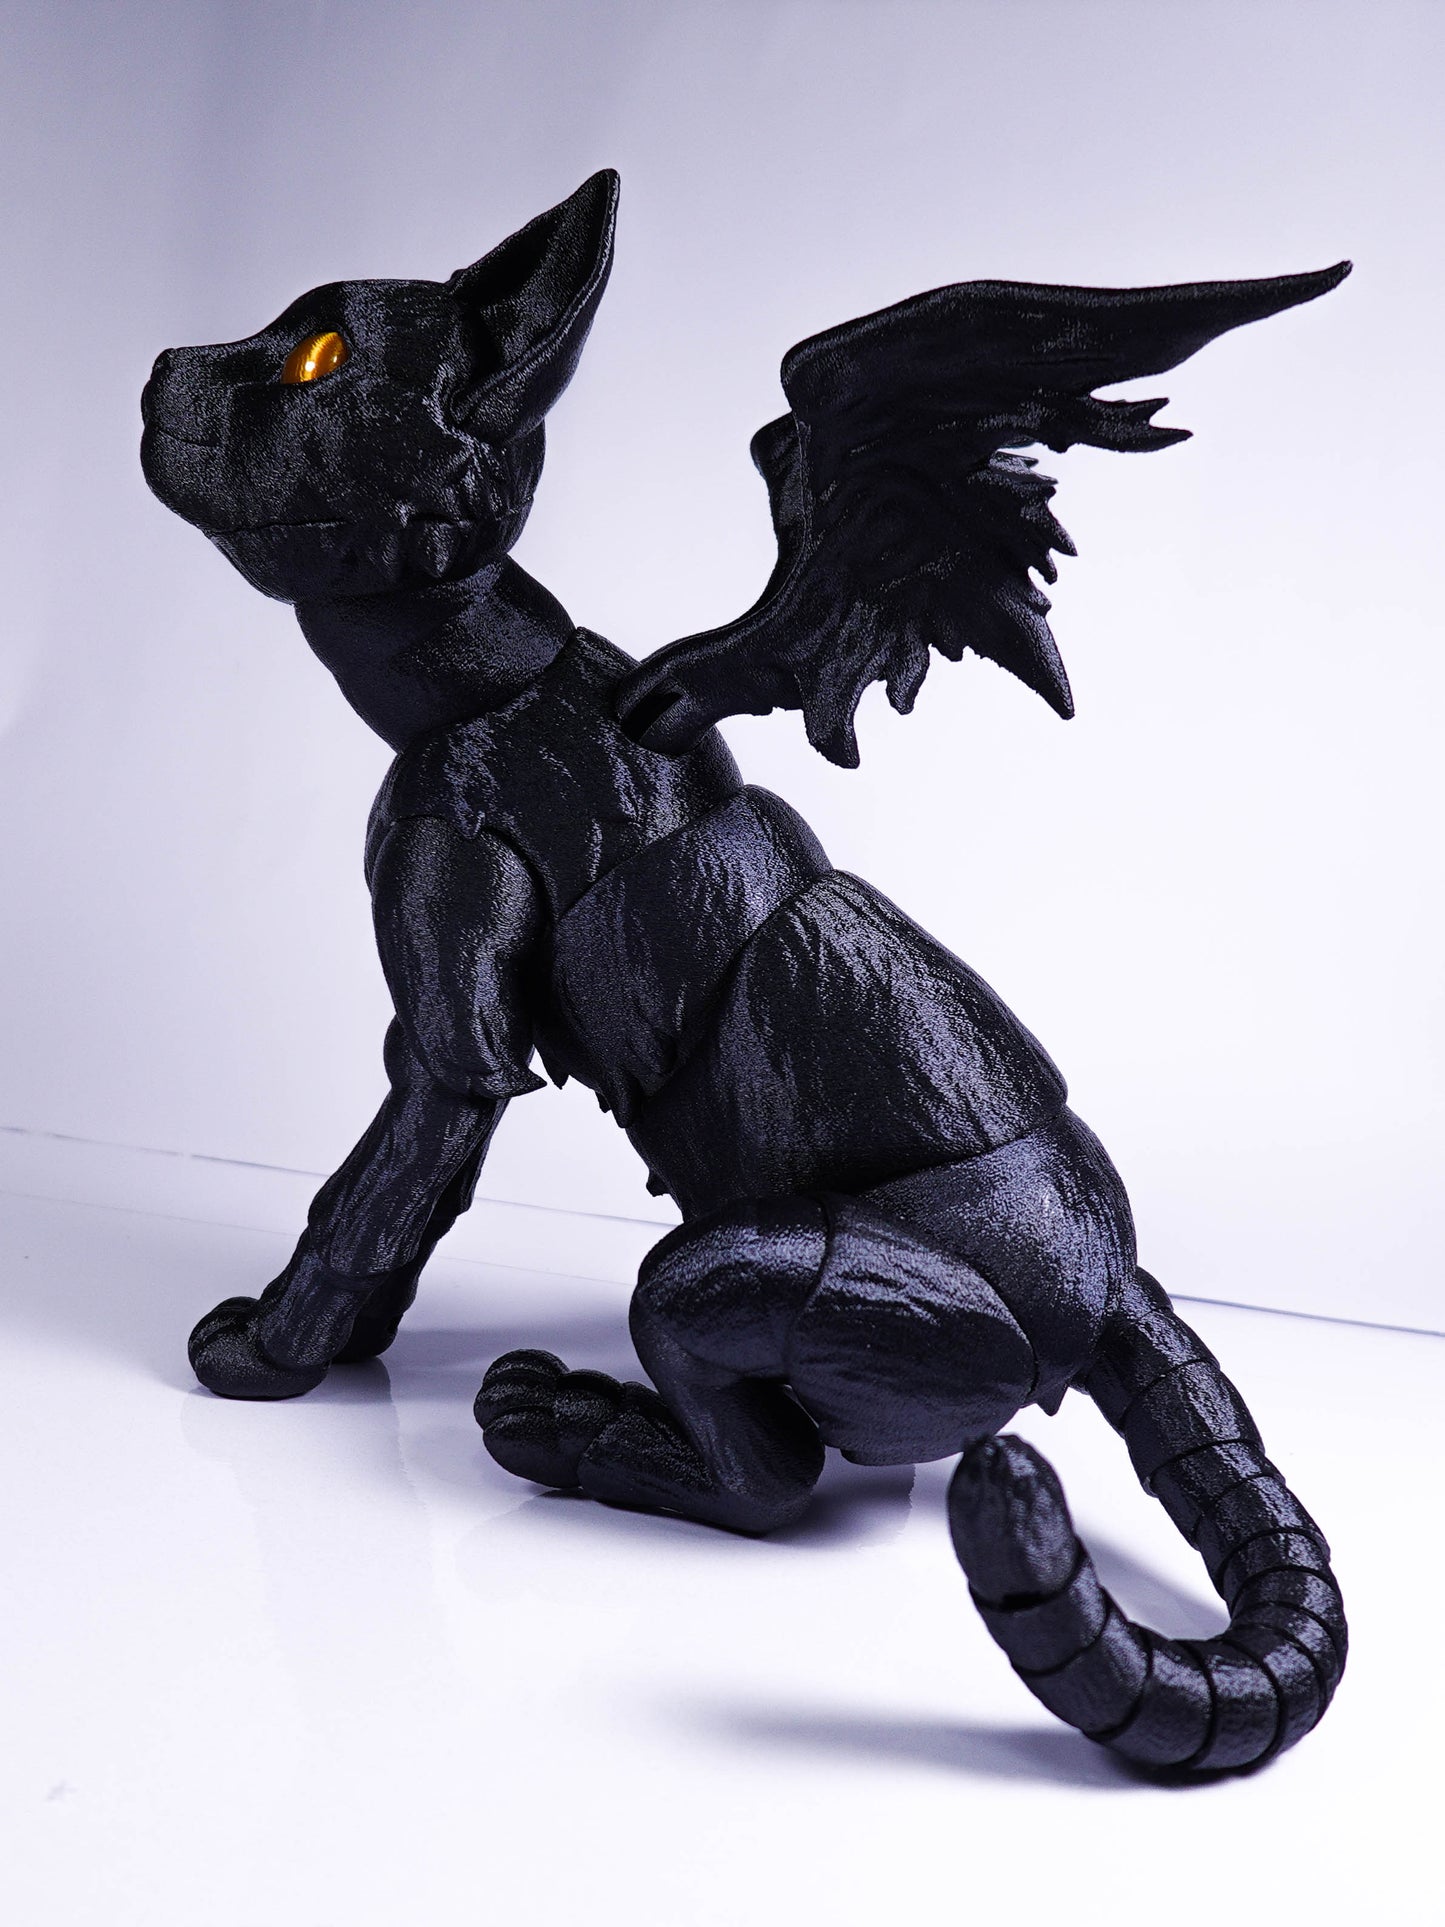
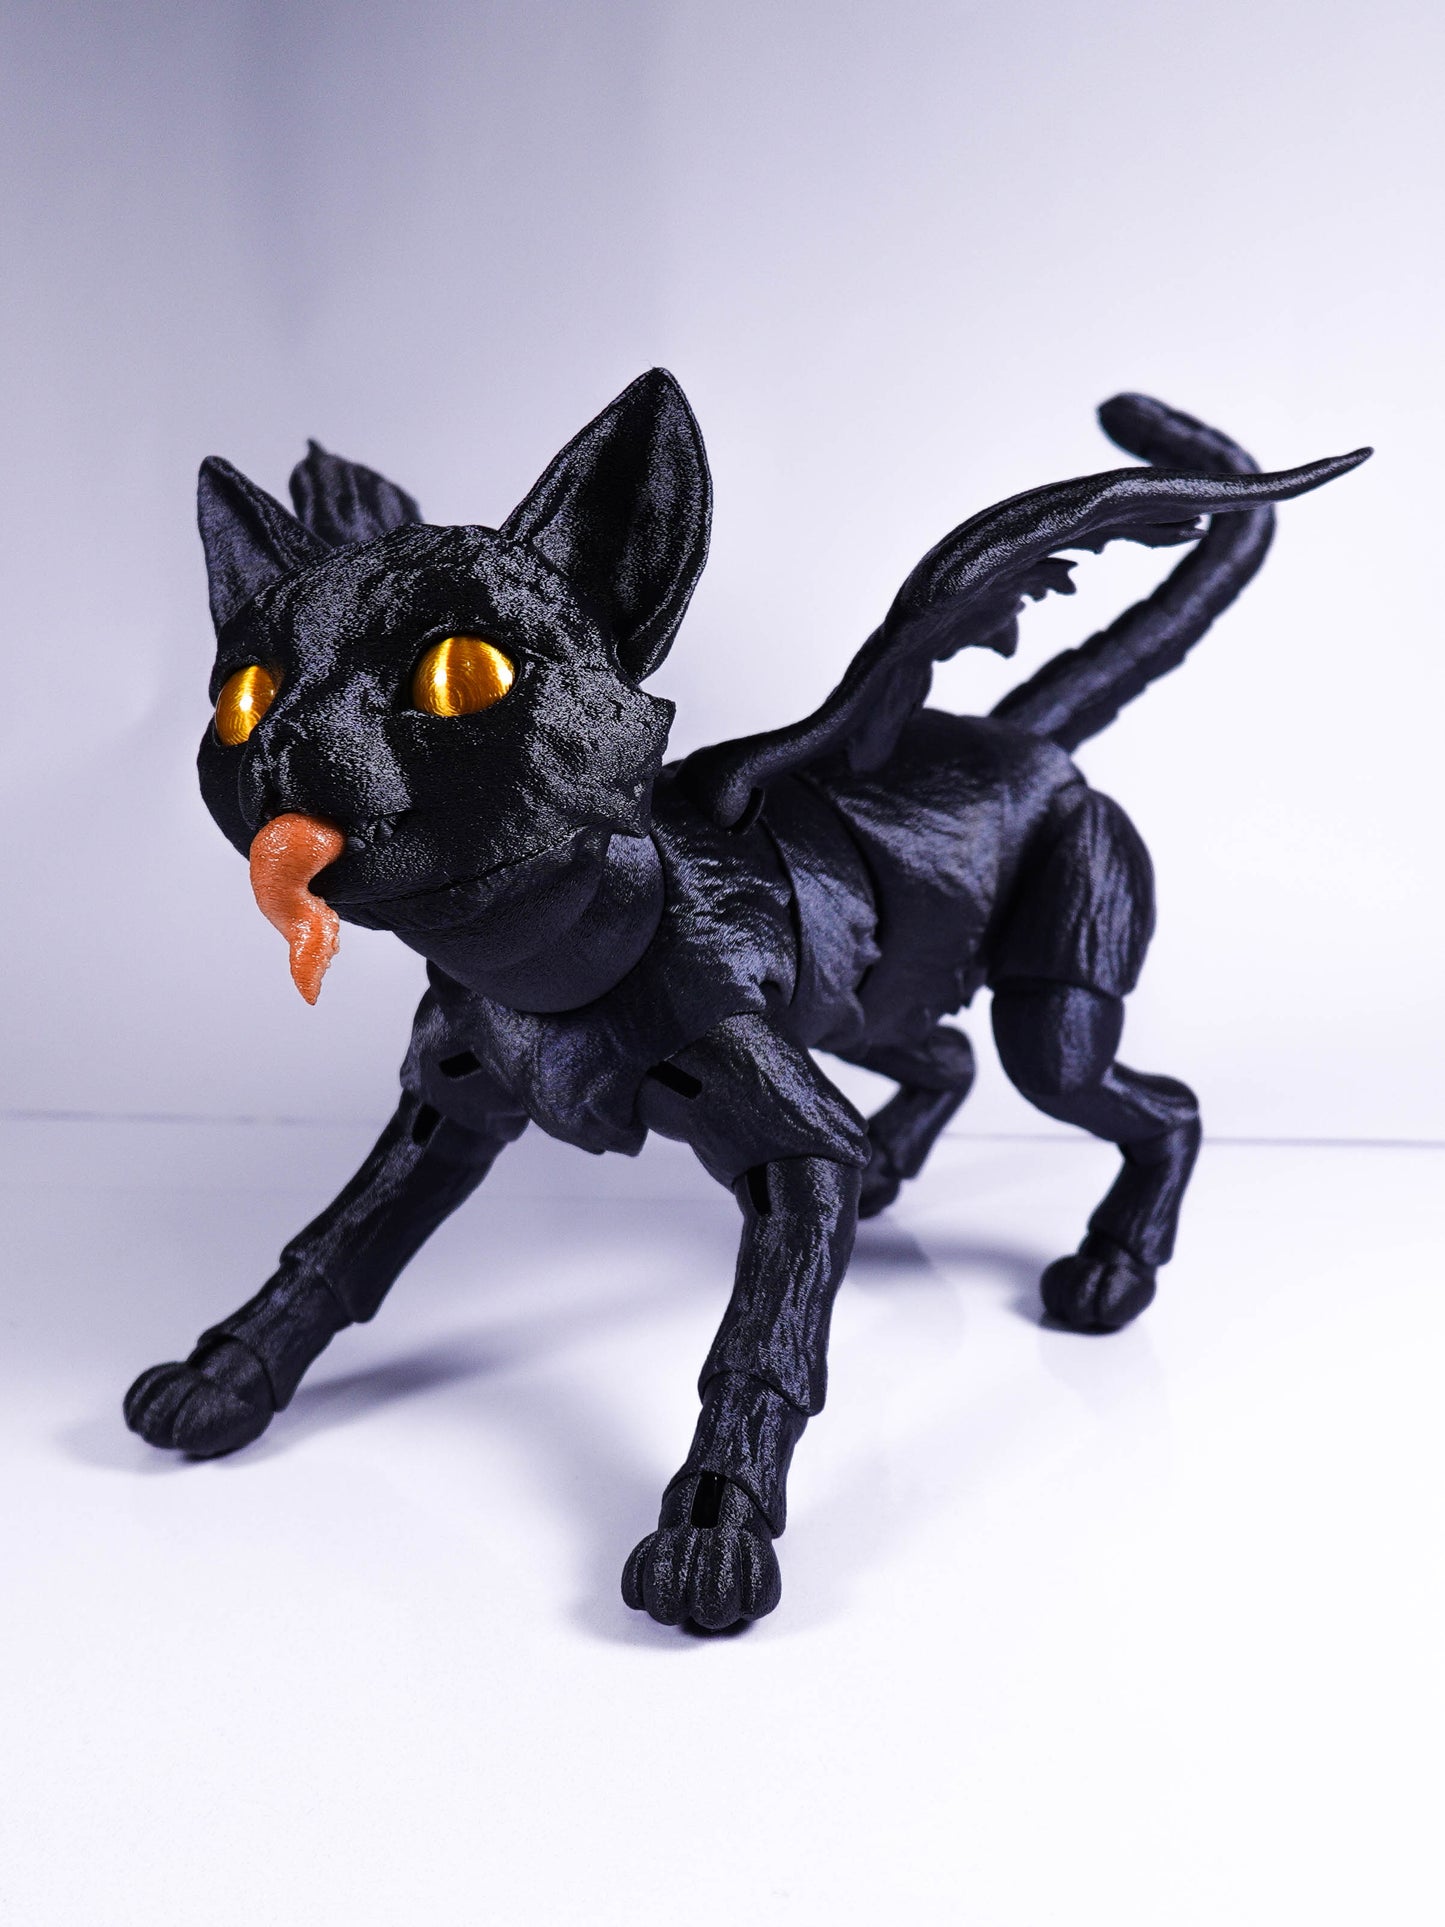
To cope with my Death Stranding 2: On the Beach hype I spent the last few weeks cooking up a fully articulated 33cm-long Tar Cat (or whatever his name will actually be in the game)!
The Tar Cat is designed with FDM printing in mind tailored specifically for Bambu Labs Printers HOWEVER prints perfectly fine in resin or on alternative FDM machines too. The optional tentacle tongue head part also contains a multicolor version to allow you to print it using a multi-material system such as the AMS.
The eye-chip and head is designed to be fully magnetised to allow for easy stringing and customisation.
All parts of the display models were printed on Bambu Labs printers and the Bambu Studio file containing all my settings and pre-painted parts is included. I believe the .3mf file should be compatible with alternative multi-colour printer's slicing software (such as Prusaslicer), and all parts are printable in full-colour with just a single AMS unit (four colours).
RULES:
This STL is licensed for non-commercial use, this means you are allowed to make as many copies as you like/make modifications to the files but you cannot share/sell the files or any prints you produce using them.
However if you're interested in selling prints made using this file, shoot me a message at thanatoys@outlook.com or my Instagram account @Thanatoys and we might be able to figure something out.
I'D ABSOLUTELY LOVE TO SEE ANYTHING YOU MAKE WITH MY FILES SO PLEASE TAG ME WHEREVER YOU POST! I'm @Thanatoys on most platforms!
3D printing settings
REQUIRED COMPONENTS:
S Hooks -
Small Hooks (4x 1.3/0.9cm hooks) (These are used to hook the feet onto the doll's elastic cord)
Elastic Cord -
2.5mm Cord (You can pick any color you wish, I usually try to go with one that best matches the parts it's threaded through)
Magnets -
8x 6mm/3mm round magnets (plus an additonal 4 for the optional head part)
Hot glue gun/glue sticks -
I definitely recommend sueding the joints with hot glue to allow the doll to hold poses, especially if printing in a material such as PLA due to it's slippy nature. It also helps to protect these areas from wear over time. If you're unfamiliar with sueding I show a little glimpse of how I do it in my tutorial but if you scroll up I've also linked a more in-depth tutorial of the process.
(optional) Craft Wire (For wiring the legs) -
2mm 6 Gauge Aluminium wire
(optional) UV Resin/UV Clear Nail Gel -
Used to gloss over/dome the eyes. I use a 50/50 mixture of the two as I find it's the perfect blend of scratch-resistance and sheen.
UV Resin Kit
UV Nail Gel
FDM PRINT SETTINGS (premade settings I use are included in my Bambu Studio Project):
Layer height - .16 for larger parts, then either .12 or .08 for detailed parts like the face/eyes/feet etc.
Infill: 15% Gyroid
Fuzzy Skin (To mask layer lines effectively in combination with the surface texture): .15 Point Distance .15 Thickness
Supports: I always use manual as most parts are made to be printed on top of supports rather than on the build platform. All my custom support application is included in the Bambu Studio project.
Colours: All of the parts are pre-painted with Bambu Studio's in-software tools/custom modifiers so if you have a Bambu Labs printer and a AMS system you'll be able to print the parts in full colour. This particular file should be usable in Slicers for alternative printers that utilise a similar multi-material system.